SmartFrog Plug-In ReadMe
SmartFrog Plug-In Readme
System RequirementsInstallationQuick Start Guide
System Requirements
The system requirements are the following:
- SmartFrog.3.10.000 release or newer
- Java 1.4
- Eclipse 3.0 or 3.0.1
- The %SFHOME% environment variable must be set to SmartFrog_Install_Dir\dist.
- Tested on Windows system only
Installation
To install the Eclipse SmartFrog plug-in, do the following:
- Download the test build from Sourceforge.net.
- Unzip the files in the %EclipseHome%\eclipse\plugins directory.
Quick Start Guide
How to Create a SmartFrog Project
- From the Eclipse menu bar, select File > Project > SmartFrog. This opens the following dialog.
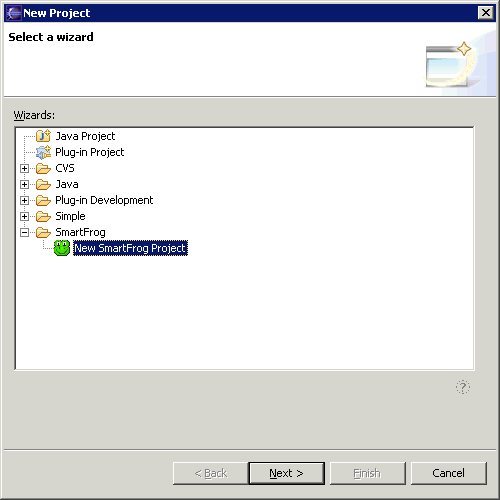
- Expand SmartFrog and select New SmartFrog Project. Click Next. This brings up the following page where you can specify a project name:
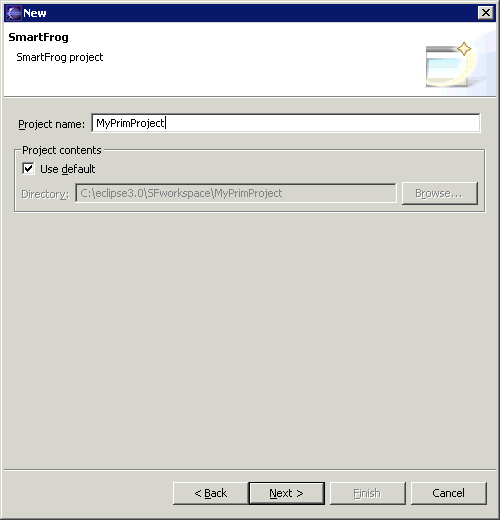
- In the Project name: field, specify the project name. Click Next. This brings up the following:
You can accept all the default values on the various tabs. As you can see from the above screen shot, the relevant libraries have been imported into your project.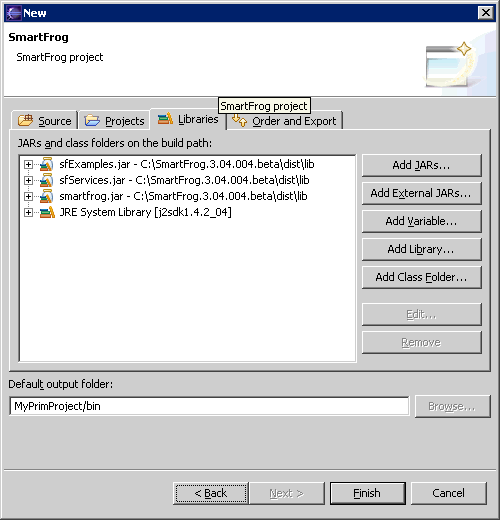
- Click Finish. You are automatically placed in the SmartFrog perspective.
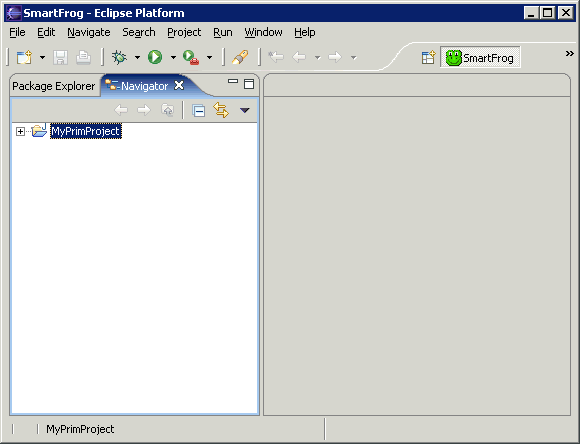
How to Create a SmartFrog Description File
- From the Eclipse menu bar, select File > New > SmartFrog Description. This opens the following dialog where you can specify a name for your description file:
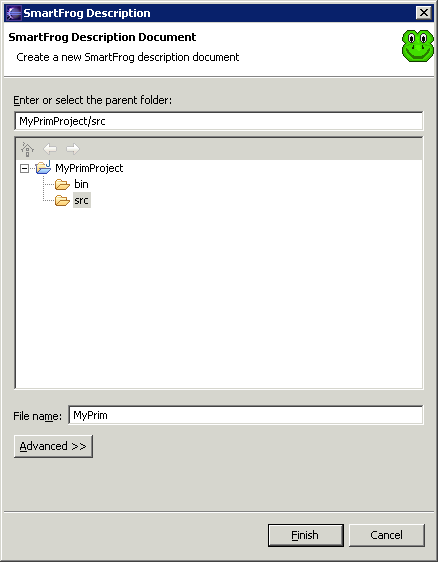
- In the File name: field, specify a name.
- Click Finish. This opens the empty SF file in the editor pane of the GUI.
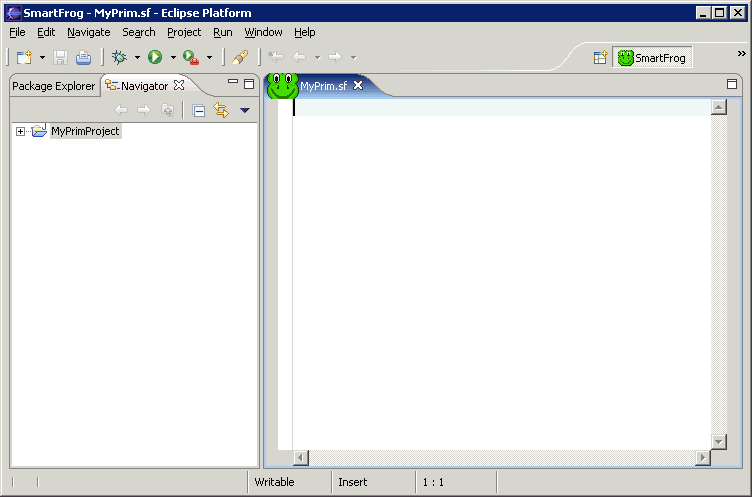
- Cut and paste the following code into the editor pane:
#include "org/smartfrog/components.sf"
#include "org/smartfrog/examples/helloworld/printer.sf"
#include "org/smartfrog/examples/helloworld/generator.sf"

sfConfig extends Compound {
    /**
     * Generator component
     */
    g extends Generator {
    /**
     * Message vector
     */
    messages ["hello", "world"];
    /**
     * Link to the instance of the printer
     */
    printer LAZY ATTRIB p;
    }
    /**
     * Printer component
     */
    p extends Printer {
    name "myPrinter";
    }
}
Immediately, you will see the editor feature of syntax coloring.
Another useful editor feature is the ability to define a section of code that you want to expand and collapse.
- To define a code area that can
- expand and collapse, also called a folding region, highlight the lines of code you want in this region. Right-click in the editor, and select Define Folding Region from its context menu.
This creates a triangle icon to the left of the defined region that allows you to expand and collapse that portion of the code.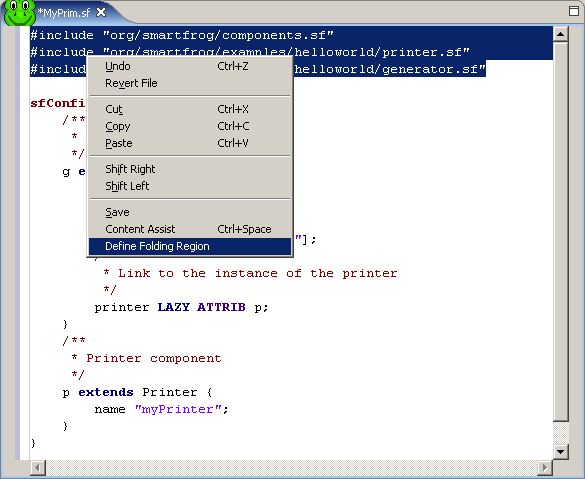
How to Create a Java Class File Using SmartFrog Interfaces
- From the Eclipse menu bar, select File > New > Class. This opens the following dialog where you can specify a name for your Java class file:
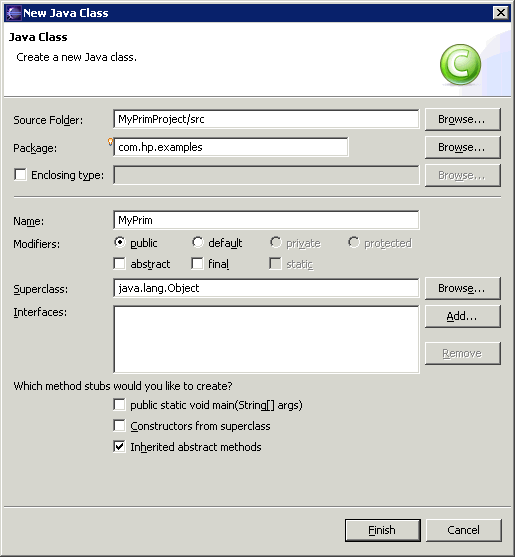
- In the Package: field, you can accept the default or specify a package name to avoid name clashes. In the Name: field specify a name for your Java class file. In our example, the file name is MyPrim.
- Click Finish. This opens a skeleton Java class file in the editor pane of the GUI.
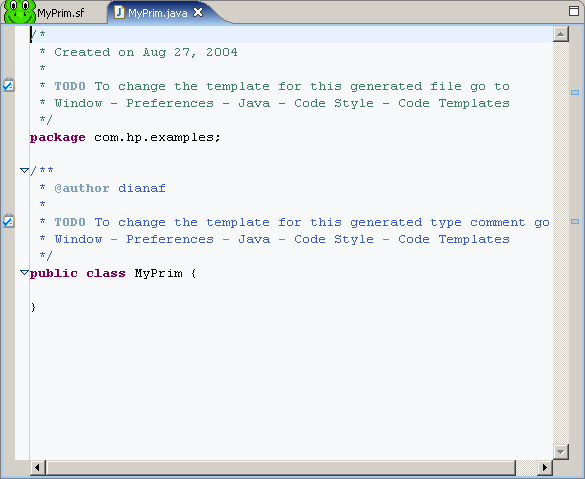
- Highlight public class MyPrim {} in the editor and cut and paste the following code over it:
import org.smartfrog.sfcore.prim.Prim;
import org.smartfrog.sfcore.prim.PrimImpl;
import org.smartfrog.sfcore.prim.TerminationRecord;
import org.smartfrog.sfcore.common.SmartFrogException;
import java.rmi.RemoteException;

public class MyPrim
extends PrimImpl
implements Prim
{
/* any component specific declarations */
public MyPrim()
throws RemoteException
{
}

public synchronized void sfDeploy()
throws RemoteException, SmartFrogException
{
super.sfDeploy();
/* any component specific initialization code */
}

public synchronized void sfStart()
throws RemoteException, SmartFrogException
{
super.sfStart();
/* any component specific start-up code */
}
public void sfTerminate(TerminationRecord arg0) {
// TODO Auto-generated method stub
super.sfTerminate(arg0);
}

/* any component specific methods */
}
The code has syntax coloring as does the description file.
Another useful editor feature is the ability to see the classes in an imported package.
- To see the classes contained in an imported package, highlight the import statement and click CTRL-Space.
A pop-up box appears containing the classes contained in the highlighted package.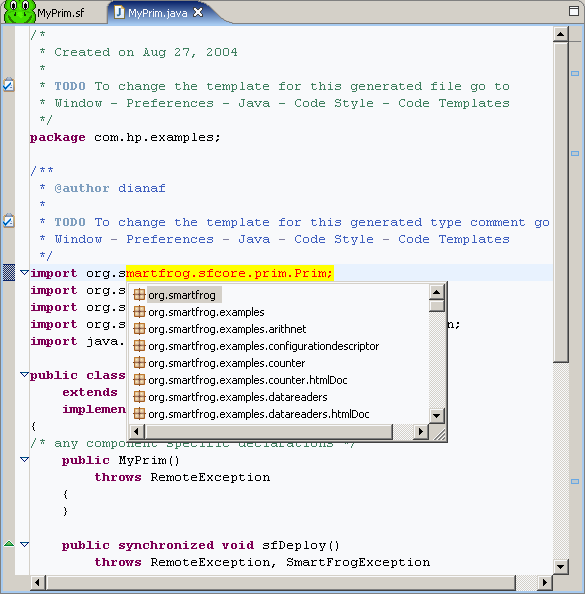
How to Change SmartFrog Installation Location
If you have more than one installation of SmartFrog on your system, you may want to configure Eclipse to point to a different installation location. The libraries in the specified location are the ones that Eclipse uses when compiling your Java files.
- From the Eclipse menu bar, select Window > Preferences. This brings up the Preferences dialog.
- Select SmartFrog in the left pane of the dialog page.
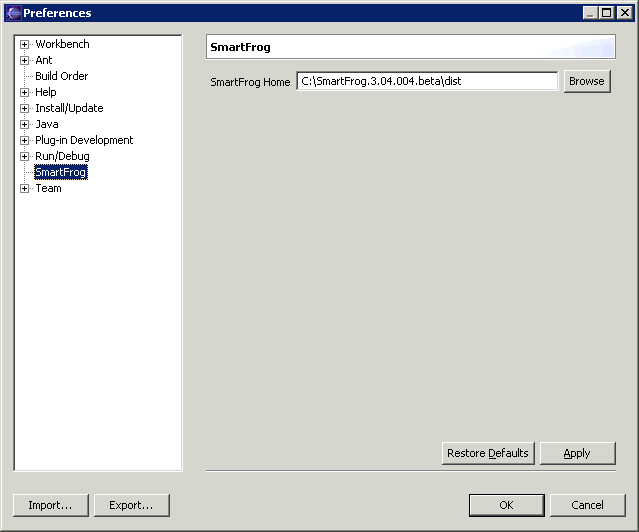
In the SmartFrog Home text field, the current location specified in the SF_HOME environment variable is displayed. - If you want to change the location, browse to the new location and click Apply.

