Prototype Transport Tracker
|
Prototype Transport Tracker
|
[Introduction] [Startup] [Selecting a Tram] [Changing views] [Hot-spots] [Known Problems]
This document provides a brief overview of the functions available in the prototype interface for visualising transport movements within Helsinki. The Transport Tracker (TT) interface is separated into two parts: the 3D window (Fig. 1) and the 2D auxiliary control panel (Fig 2).
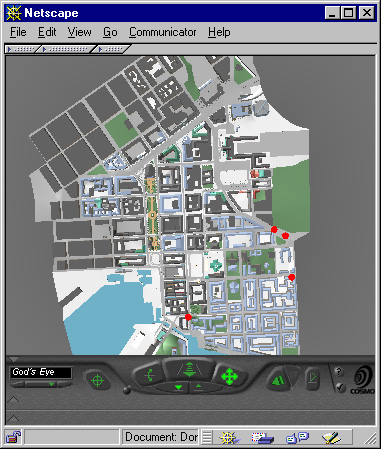
Fig. 1. 3D window onto Virtual Helsinki.
Selecting options in the control panel changes the way in which the movements of the trams are visualised. The user may also perform a large number of the same operations using the VRML browser controls and touch-sensitive objects in the 3D model.
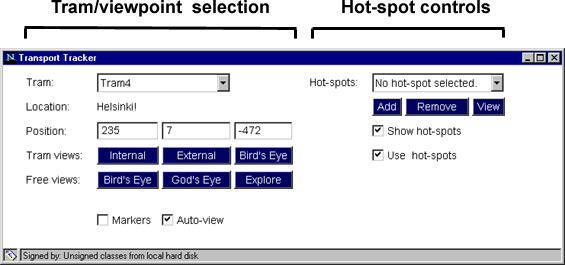
Fig. 2. Auxiliary control panel.
After selecting the web page containing the TT application, Netscape will load the CosmoPlayer VRML browser plugin and begin loading the 3D model of Helsinki. At the same time it will also popup the auxiliary control panel. Loading takes around 5 minutes in total and the user should not do anything until such time as the model and all of the trams have been loaded. The default configuration will load 1 instance of the beer tram, and 4 normal trams. If the user wishes to check the progress of the VRML loading process they may open the VRML browser output window (accessible from the menu triggered by the bottom right button in the VRML browser control panel).
When loading is complete, the user starts with the view shown in Fig. 1. This is the God's Eye view which may also be triggered by pressing the appropriate button in the Tram Views selector. The red blobs are markers which are used to highlight the position of the trams as they move around the city.
The user may select a specific tram by either choosing it from the pull-down menu labelled Tram in the 2D control panel, or by clicking on one of the markers in the 3D window. By default, Auto-view is on, which means that when a tram is selected, the viewpoint is automatically changed to Bird's Eye (Fig. 3). If the markers are enabled, then the selected tram will be represented by a pulsing yellow marker. All other trams will have a pulsing red marker.
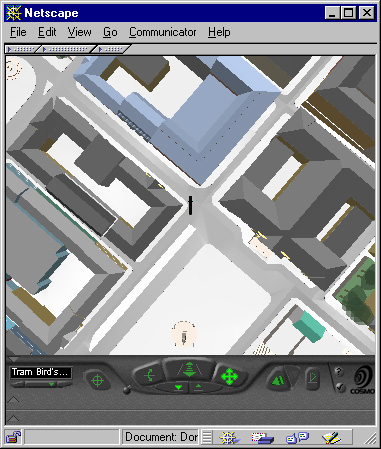
Fig. 3. Bird's eye view of the selected tram.
Once a tram has been selected, the Position display in the control panel is updated with the 3D coordinates of the tram within the city model.
There are size basic viewpoint that can be selected. There are three different views available from the Tram Views selector in the control panel:
When any of these three views are selected, the tram markers are hidden but may be re-enabled using the markers check-box.
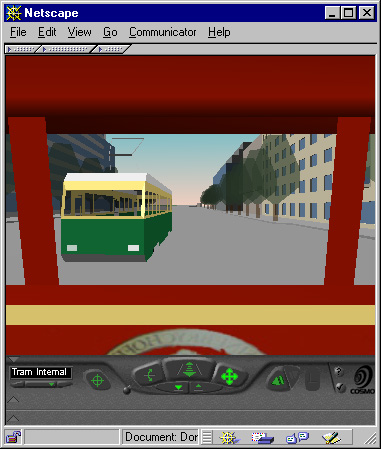
Fig. 4. View from within the beer tram.
Having selected a view, the user can modify the viewpoint by using the movement controls in the VRML browser. E.g. the user can look around when inside the tram.
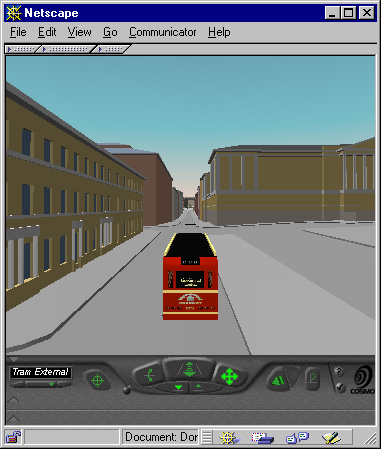
Fig. 5. External view of the beer tram.
There are also three other basic views which may be selected from the Free views selector in the control panel:
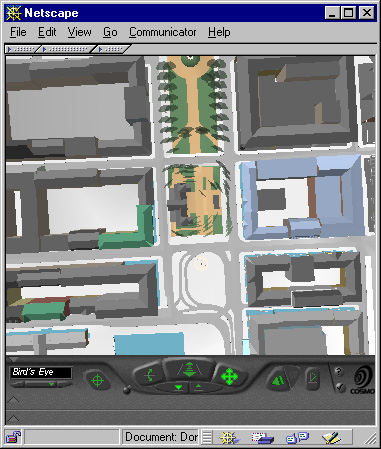
Fig. 6. Bird's eye view of the city.
Having selected one of these views, it is again possible to modify the viewpoint using the VRML browser movement controls.
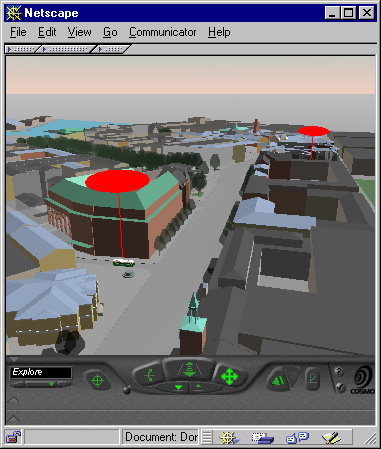
Fig. 7. Explorer view of the city.
In these three free views, the tram markers are enabled so that you can see the trams within the city. They can be removed from the view by deselecting the markers checkbox in the control panel.
When the Auto-view checkbox is checked, any change in selection of the tram of interest will result in the current viewpoint being abandoned and the tram's Bird's eye view selected. This can be quite annoying when using the free views so this feature may be disabled by unchecking the Auto-view checkbox. Now, only the information in the 2D control panel will be updated, the view will remain unchanged.
One of the most important features of the TT is the ability to create hot-spots. A hot-spot is a region of space that will act as a trigger when a transport of a particular type and designation passes through it.
To add a hot-spot, click the Add button in the hot-spot control panel. The user will then be prompted to create a hot-spot (Fig. 8).
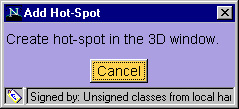
Fig. 8. Prompt to create a hot-spot.
To actually create the hot-spot, the user must click and drag on some region of space in the city model. This will create a purple, spherical volume of space (Fig. 9). This hot-spot will be used to trigger a pop-up reminder when the specified tram passes through that volume. It's best therefore to keep this volume quite small (there is no limit to its size) and also best to create it by clicking and dragging on one of the roads rather than a building!
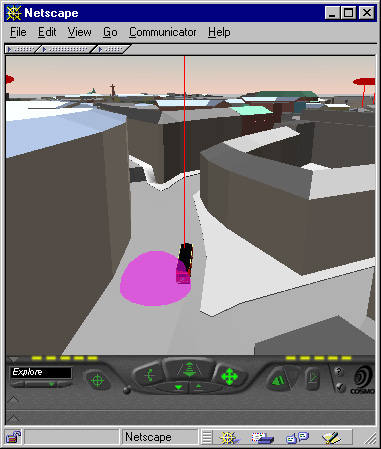
Fig. 9. Purpose hot-spot and tram approaching.
Having dragged a hot-spot into existence, the user releases the mouse button and will be prompted by a dialog box that allows them to name the hot-spot and establish a filter (Fig. 10).

Fig. 10. Name a hot-spot and specify an event filter.
The name of the hot-spot can be anything. The Activated by pull-down menu offers a few options for the kind of filter to be applied:
In Fig.10 the user has decided that they are only interested if the tram called "Tram0" (the beer tram in this case) passes through the hot-spot. When this does occur, a small dialog box will pop-up (Fig. 11).
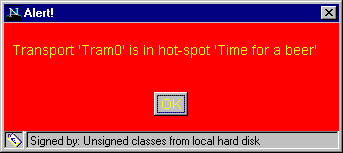
Fig. 11. Hot-spot alert.
To clear the alert just press OK.
The Hot-spots pull-down menu in the control panel allows the user to select a specific hot-spot. After this has been done, the hot-spot may be removed by hitting the Remove button. The View button does not do anything in this release.
The user may display or hide the hot-spots that have been created by checking or unchecking the Show hot-spots checkbox respectively.
Simlarly, the user may enable or disable their use by checking or unchecking the Use hot-spots checkbox respectively.
Prototype Transport Tracker User GuideHewlett-Packard Laboratories, Bristol, UK |